Dogs love exploring their surroundings with their paws, but sometimes they get injured and need bandaging. Bandaging a dog’s paw can be tricky, but it is important to do it properly to protect the wound and speed up the recovery. This article will show you how to bandage a dog’s paw in five easy steps, and what to do after bandaging.
Key Takeaways
- Bandaging a dog’s paw can help prevent infection and promote healing of wounds, cuts, or scratches.
- Bandaging involves cleaning the wound, applying antibiotic cream, covering it with sterile gauze, wrapping it with cotton padding, and securing it with self-adhesive bandage.
- Bandaging should be done carefully and checked regularly to avoid complications such as swelling, redness, or pus.
- Bandaging should be accompanied by limiting the dog’s activity, preventing them from licking or chewing the bandage, and consulting a vet if needed.
You Might Also Like:
How To Bandage a Dog’s Paw?
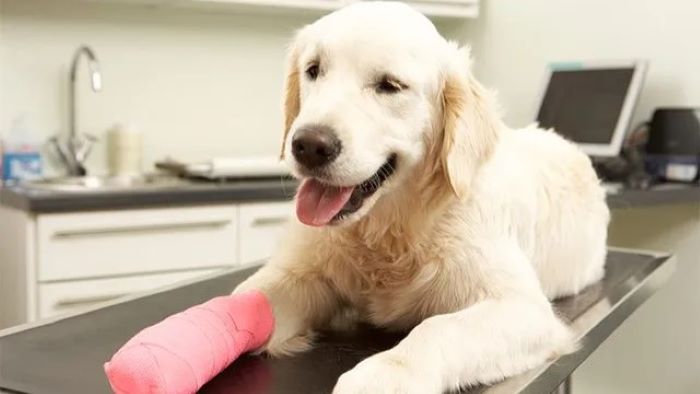
When your dog suffers injury in their paw, you will see scratches, incisions, or deep cuts. These are quite fatal if left unattended. The simple way to begin their recovery process is by applying a bandage. Clean the wound and apply the bandage. If possible, take someone’s help while doing so.
Further, you need to properly apply the bandage and prevent your dog from having any severe infection. So, even if the injury is a minor one, you need to use a bandage. Also, covering the injured area of the paw is crucial and if you manage to do it properly the scope for an infection is minimised.
But, before you apply the bandage to the dog’s paw, here are some important questions that you need to consider while addressing their injury:
- How serious is the injury?
Analyse the depth of the paw injury and see how bad it is. If your furry friend is bleeding heavily then you may have to immediately cover the wound and take them to the nearest clinic or a hospital. Because deep wounds require clinical expertise.
- Is there anything stuck in the paws?
Your dog may also have a small stone or pebble stuck in the gaps between their paw while injuring themselves. So, if there are any stuck, it’s crucial to remove them to help them relieve the pain. If you immediately remove these stones they will get less swelling.
- What type of injury it is?
Before you apply the bandage you must know the type of injury your furry friend has suffered. Your dog may have suffered an injury while being in a fight, may have fractured their bones while running, injury to the eyes while rushing through the bushes, ligament injury, limb injury, cuts, or scratches from the sharp objects, or a torn toenail.
Steps For Applying a Bandage On a Dog Paw
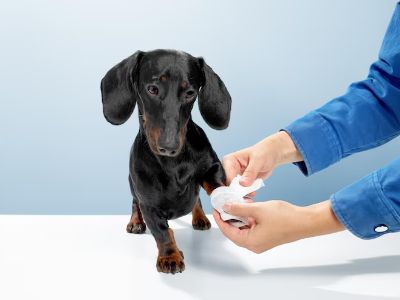
Once you manage to identify the severity of the injury, you can start applying the bandage. There are some specific steps that you can follow and ensure that your furry friend’s paw is treated properly. Because the slightest disorientation may lead to infection. Below are some of the steps you can follow:
#1 Gather the equipment
You will need to gather the necessary materials and some basic equipment for treating the wound and applying the bandage on your furry friend’s paw.
- Piece of cloth or a towel for cleaning the wound
- Sterile non-stick dressing for covering the wound
- Cotton padding for wrapping it around the dressing
- Scissors for cutting the bandages
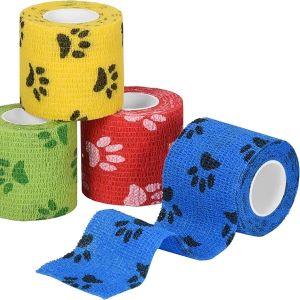
- Self-adhesive bandage
- Gloves for protection from infection
- Antibiotic cream (vet prescribed)
In general, these materials and equipment are there in the house, but, if you don’t have them, can easily buy them from a nearby medical store or simply online. In addition, you can also use the household items like a sock, or old clothes. Just make sure they are clean and don’t have any loose ends.
#2 Cleaning the wound
Before applying any bandages, it’s important to properly clean your dog’s paws. See our guide on how to clean dog paws for tips.
You must remove the dirt, debris, or any bacteria that are possibly present in the wounded area. You can use warm tap water or a warm salt solution for cleaning the wound. So, here is how you must proceed with the cleansing process,
- Put the gloves on and gently wipe the wound using a clean towel or cloth that is soaked in warm water or a saline (salt) solution. Avoid using alcohol, iodine, or hydrogen peroxide because they can irritate the wound and slower the wound healing.
- Dab the wound with the help of another clean cloth. Once you make the wound dry, apply a thin layer of antibiotic cream or a similar ointment. Avoid using human medications because they are toxic for dogs.
- Cover the wound using a sterile non-stick dressing material or sterile gauze. Make sure it covers the entire wound and no skin is left exposed.
#3 Cover the gauze
Now, after covering the wound you need to wrap it as well. The cotton padding must be wrapped to ensure that the sterile gauze or the bandage remains intact. Here are some tips you can consider while covering the wound:
- From the region below the wound, work your way upwards and overlap the wound layer roughly half an inch.
- Wrap the gauze around the wound but, not too tight. Maintain a gap of two fingers in the wrapping and the wound, this will ensure the blood circulation remains normal.
- In case you are, applying the bandage on the leg, make sure you are applying it on the foot and toes to prevent any swelling or compromise blood circulation.
- When you are applying the bandage on their tail, leave some room at the tip for wagging. Otherwise, your furry friend may have constriction and tissue damage.
#4 Securing the bandage
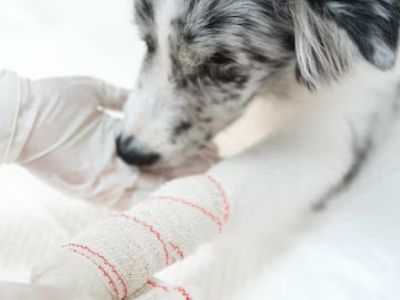
The final step in the process is securing the bandage. You can use a self-adhesive bandage or a vet wrap. For securing the bandage you’ll have to follow the same instructions from the previous steps:
- Secure the bandage from below the gauze while moving up and overlapping each layer by half an inch.
- Make sure the wrapping is not too tight i.e. maintain a two-finger gap.
- Cut off the extra bandage using scissors and tuck it under the previously wrapped layers.
- If the wound is on the leg, make sure you leave some gaps at the top and bottom of the bandage for leg movement.
Looking for the best paw balm for dogs. Check out our recommendation for the best paw balm for dogs UK.
Things to consider post-bandaging
In the previous section, I provided some of the steps you can refer to while applying the bandage to your dog. Now, once you are done applying the bandage, the job is only half done. Yes, you read that right, only half done!
I say this because, often owners tend to forget that they have applied the bandage and the same goes for your furry friend. They may not remember the wound and wrapping and while they walk or run the bandage comes off and the wound is left exposed.
So, monitoring your furry friend after applying the bandage becomes crucial. Here are some things to consider after bandaging:
- Check the bandage twice a day. Look for signs of any infection, swelling, redness, odour, pus or heat. Change the bandage if you observe any anomaly and call your vet to ensure the damage is not worse.
- In addition, when you check the bandage, look for wetness, dirtiness, tightness or looseness.
- Change your furry friend’s bandage every day. If your vet has recommended a specific buffer, for instance, every two or three days follow that instruction.
- While you change the bandages make sure you clean and make the wound dry before using the new bandage.
Further, there are some additional points you need to consider to ensure that the bandage remains intact and is not hindering the recovery process.
- Restrict your furry friend’s activities
While your furry friend is recovering, you need to ensure that the movement around the wounded region is minimal. This means, your dog must not walk for long, run, jump or play. Any of these activities will hinder the recovery progress because the bandage or the wrapping will get loose and if not changed, may lead to infection.
- Use a muzzle or a sock
Some dogs nibble more in comparison with the others and this instinct often makes them lick their own wound. So, using a muzzle becomes crucial to stop them from licking their wound. You can use an Elizabethan collar to stop your furry friend from nibbling their wound. A sock around the bandage will also do the trick.
- Keep the bandage dry
The bandage should not get wet otherwise it can worsen the condition. Your furry friend might get an unwanted bacterial infection if their wound comes in contact with the water. Thus, make sure your furry friend is far away from bathtubs, pools, lakes or rivers.
- Inspect wound continuously
For the first couple of days, you’ll have to check the wound and see if there are any significant changes. If the condition is improving keep following the procedure and also make sure you give the medications on a daily basis as per the vet’s advice. However, if there is no improvement in the condition or it’s degrading, take your dog to the vet for treatment.
Recovery From The Wound
Once your dog is treated with their wound on the paw, you shall expect a long time for their recovery. There are four basic stages that you can expect while your furry friend recovers from their paw injury.
- Inflammation – this stage begins instantly after the dog is wounded. The immune system immediately responds to the impact and it fights with the bacteria and initiates the healing process. You will see your dog suffer from swelling, heat, redness, pain and lameness.
- Debridement – this stage sets in a few hours after the inflammation and is meant to clean up the wound. In this process, you will see some pus forming near the wound and this helps to carry the debris out of the wound.
- Repair – this one happens after a couple of days of the injury. This stage mainly involves the formation of the granulation tissue which is a pink or red tissue. It fills up the wound and facilitates new skin growth.
- Maturation – the maturation stage begins two or three weeks after the injury and can last for about months and even years. This phase is long because the new tissue and skin are reorganised and strengthened.
The recovery process will solely rely on the severity and the type of wound. For instance, a closed wound is likely to heal quicker in comparison with an open wound. But, why? Let’s have a look at the reasons:
- Open wound
An open wound will take time to heal because the granulation tissue gets filled in first and then the skin cells can resettle over it. Also, these types of wounds normally occur because of the biting and are left open for healing. They are not surgically treatable and hence, the bandage is used on a regular basis for such wounds.
- Closed wound
The closed wound is often quick to heal. It will heal within 48 hours. This is surgically stitched and glued together. Deep cuts or wounds resulting from an incision are handled with stitches and closed up. Here you need to monitor your dog’s paw or leg continuously and make sure they don’t break the stitches or get wet.
FAQs
How long can you keep the bandage for dogs on their paws?
Normally, the bandage should get changed after 24 hours. But, if a vet has applied the bandage and instructed you to keep them on for a longer period for your dog’s recovery then it’s best to keep the bandage on. Just make sure there is no contact with the water or a liquid and also that your dog doesn’t perform any intense exercise.
When to apply a bandage to a dog’s paw?
If your dog is having a deep wound on their paw and that wound is open, bleeding, or infected, you will have to apply a bandage on it. In addition, torn toenails, ruptures in paw fingers, stings, scratches or bites from other dogs can also have a serious mark on their paws and need instant medical attention. If the bandage doesn’t contain these situations, you may observe swelling, redness and other such symptoms. In such cases, you may need a vet’s opinion.
How long does it take for a dog’s paw to heal?
Generally, it takes about three to four weeks for a dog’s paw to heal and get back to its original condition. But, the severity of the injury may either cut short this timeframe or even elongate it. For example, a minor cut could possibly heal within two weeks on the contrary, a deep cut or a fracture in a dog’s paw may take more than four weeks to recover.
Which creams are useful in treating dog wounds along with bandages?
Some of the creams that are useful in treating dog wounds with bandages are – antiseptic cream, Musher’s Secret and paw balm. The paw balm can help maintain moisture in cracked paws, whereas the Mushers Secret will help create a barrier between the paw and the ground preventing abrasions. The antiseptic cream will handle minor cuts and prevent infection as well.
How To Bandage a Dog’s Paw – Final Words
If you are an experienced owner then you probably know how to address this wound situation and use a bandage on the dog’s paw. But, for a newbie, it’s crucial to follow certain steps and handle the wound with proper care. Because bandaging a dog’s paws can get tricky.
The normal approach is using the home first aid kit which you have and using the equipment available. Clean the wound and use the cream and wrap the wound using a sterile cloth. In a situation where you feel the wound is getting worse even after applying the bandage visit the vet and get a clinical treatment done for the injury on your furry friend’s paw.
Remember, dogs often chew their own paws, so monitor your dog closely after bandaging to ensure they don’t remove the bandage by chewing. Understanding why do dogs chew their paws can help you address the root cause.
